Wednesday, October 31, 2012

a tutorial~ simple patchwork and stars!


Thanks so much for all your sweet words on the simple patchwork and stars quilt!  I'm excited to share the tutorial with you!  I've had several people ask if I followed a pattern, but this is something I drew out on paper and then made the quilt.  I didn't follow a pattern. :)  So here is how I made the quilt and what you'll need~

Rotary Cutter, Ruler and Mat
Fat Quarter Bundle of The Simple Life, by Tasha Noel for Riley Blake
1/2 yard of Red, Pink and Aqua solids
1/4 yard of white solid (for border)
3/4 yard of Simple Floral in Aqua (for border)
1/2 yard of Simple Gingham in Red (for binding)
Batting
Backing fabric

The finished size measures 51 1/2 X 60 inches.

Lets cut our pieces...Cut 120, 3 1/2 inch squares for the patchwork, 49, 6 1/2 X 3 1/2 inch rectangles, 7, 3/12 inch squares of red and pink, 56, 2 1/2 inch squares of red and pink, and then 6, 3 1/2 inch squares of aqua, and 48, 2 1/2 inch squares of aqua.  To go faster I cut 4 rows at a time. 

For the fussy cutting I use a 3 1/2 inch square (from Joanns), to make it easier to get the images centered.

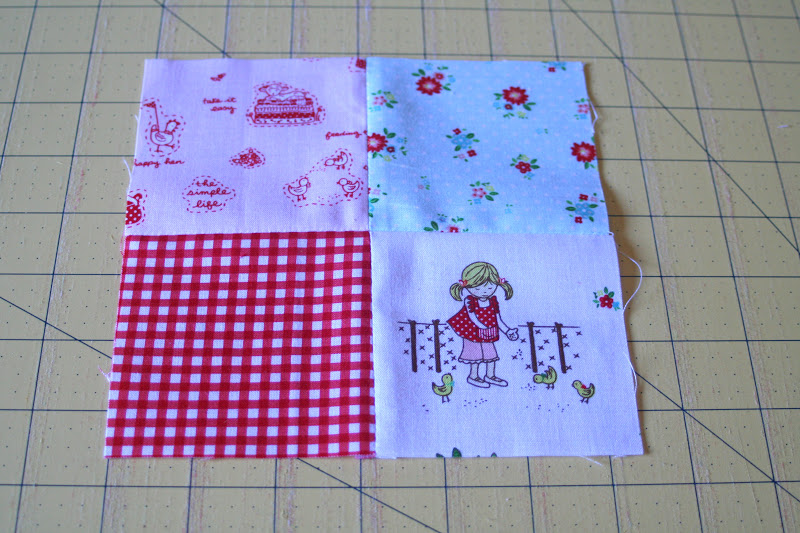
 Lets now make our first block.  Stitch 4 squares together.

To make the star part,  draw a diagonal line with a pencil or pen on the 2 1/2 inch square.  Then place the square on one side of one of you 3 1/2 X 6 1/2 inch pieces.  Stitch on the line and then with your rotary cutter, cut a 1/4 inch seam.  Press seams open.

 Now continue as above and stitch the other side.

Continue and do another 3 1/2 X 6 1/2 inch piece.  Then place your 4 pieces out to make your first block.

 Stitch your top to pieces together.

Stitch the bottom 2 pieces together and then stitch the top and bottom pieces together to make your first block.

 Continue making your blocks.

 Keep going!  :)

 Now we have all our blocks together.  It is pretty simple, right!?!

Stitch the quilt top together by sewing the blocks into rows and then your rows together.

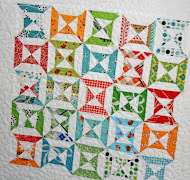
 Yeah, the quilt top is done!

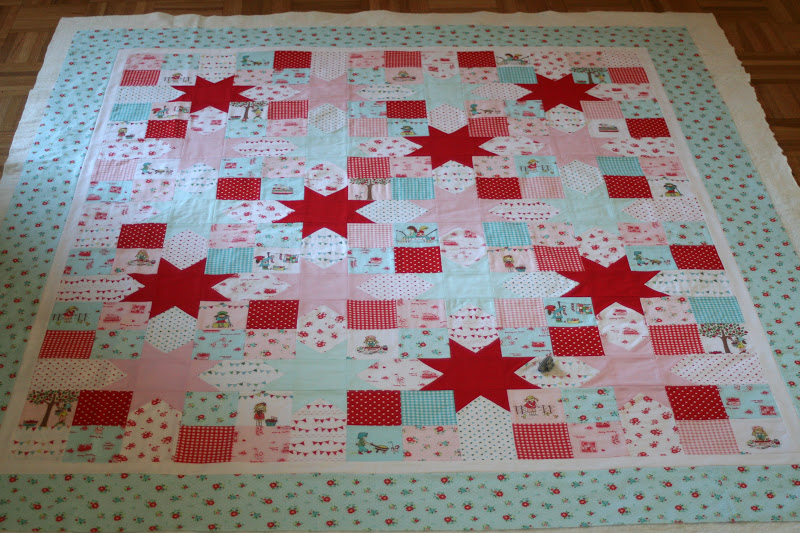
Now all you have left is to add a 1 1/2 inch white border, your 5 1/2 inch border, then sandwich, quilt and bind your quilt!!
 

Isn't that fun and easy!  I hope you enjoyed the tutorial!


Happy Halloween, my friends!


Thursday, October 25, 2012

simple stars and patchwork quilt!


I'm so excited to show you the sweet quilt I made for market!  It was so fun being able to use Tasha's adorable fabric and wanted to make a quilt that would showcase the cutsie-ness!!  What better than patchwork and stars!  I simply love those both.  Today it will be winging its way to market with Tasha!!   :)


Before I drove the quilt over to Tasha I thought it would be fun to take some pictures of it at a farm down the road from me.  It sure looks so pretty up against the barns!


Next week I'll post a tutorial on how to make this cute quilt!   :)  Also, I do have The Simple Life collection available in my shop.


For shop news, It has been a little crazy here.  Finishing up the quilt for market and spending some time in the ER with my daughter after she collapsed at school, but they couldn't figure out why.  She was up late last night really sick and so have an appointment for her to see the doctor tomorrow to make sure it isn't related to what happened earlier in the week..   I'm praying everything is o.k.     Because of the craziness of this week I'm a bit behind on orders, so all my lovely customers please know I'll be trying to catch up as quickly as possible.


Thursday, October 18, 2012

easy double hexagon pillow tutorial!

Its been a little crazy lately.  I was hoping to post last week but life got too busy. Thanks for being so patient in waiting for the tutorial!  You're the best!!  :)


Here is what you need~


Rotary cutter
20 coordinating 1 1/2 inch strips x the width of the fabric
60 degree triangle (I got mine at Joanns and used my 40% off coupon)
Pins
Quilting ruler
Ruffle elastic lace and crochet trim (optional)
2 Coordinating backing fabrics for pillow
Batting

Cut and pair up your 1 1/2 inch strips.  Start with your first pair and then place the strips right sides together and stitch a 1/4 inch seam.

 
Press seams.  Line up your triangle over the strip and then cut your first triangle.  After your first triangle is cut, flip the triangle the other direction and then cut the second triangle.  Continue until you have 12 triangles cut.

Your 12 triangles will make 2 hexagons as pictured above.  Continue stitching the rest of your paired strips together and then cutting the triangles.

 Arrange all your 20 hexagons.

Start with your first hexagon.  We are stitching the hexagons in halfs, not stitching each hexagon together.  You'll see why later.   Place triangle 1 and 2  right sides together from the 3 triangles of your half hexagon and pin at the seam.  Stitch a 1/4 inch seam and then press.  Continue stitching the 3rd triangle to your half hexagon, then press.  Trim the corners.

Continue stitching each half hexagon.

Place all your half hexagons so they are in rows.  We are going to stitch the rows together.

Pin your first two half hexagons together.  Look closely at the picture as there is a little of overlapping at the top.  Also the pressed seam from the top half hexagon matches up with the bottom of the under side half hexagon.  Stitch a 1/4 inch seam and then press seams.

Continue stitching your first row together and then trim the edges where the little triangles and thread are.

See how your first row looks.  So pretty!

Continue stitching each row together.

Pin row 1 and two right sides together at the points of each half hexagon.  Stitch a 1/4 inch seam.

 Press seams.

Continue stitching all the rows together. Now with your rotary cutter and ruler trim the hexagons to square them up.

Oh sew lovely!!

I added a 1 1/2 inch border so it would be an 18 inch pillow.

Sandwich and quilt the top.

For a ruffle border I stitched it on before I stitched the back on.

Then I added some pink crochet trim to the top half of the envelope backing and then stitched them on right sides together and turned it out.  Now my pillow is all done!  Yippee!!  :)

Look, my red polka dot jeans match the pillow!  Hee Hee!  ;)

I think this is my favorite trim right now!!  it!!  Do you have a favorite trim? I'd love for you to share!

I hope you are having a lovely week!


Friday, October 5, 2012

a start


I've chosen my pattern and fabrics and have started on my pillow.  Double Hexagons.  I think a pillow would be perfect out of these cute little hexagons!   They will end up being 2 inches (each side of the hexagon).


I've got all my fabrics cut and made a couple so far.   I'm pretty sure my partner will like the fabrics, just not sure if she is a ruffle or trim kind of person.  I know I am, but not everyone is.  Are you a ruffly kind of person?


I thought I'd post a tutorial on how I make the pillow next week.  Is that something you'd like to see?

Hope you all have a lovely week-end!